· 4 min read
How to Lock a Google Docs
This tutorial teaches you how to lock a Google Docs and protecting from making any edits, comments and suggestion.
Google Docs is a powerful and collaborative word processing tool that allows multiple users to edit and contribute to a document in real-time.
However, there may be situations where you want to protect your document from unauthorized edits, comments, or suggestions. Google Docs provides a feature to lock the drive files, ensuring that nobody including the owners, editors, reviewers doesn’t make any edits accidentally.
Earlier locking a file was possible only through Drive API. However, locking was introducted to the Drive interface on september 2023.
In this tutorial, I’ll walk you through the process of locking a Google Docs document, preventing any edits, comments, and suggestions from being made. Additionally, I’ll show you how to unlock a file from both the Google Docs interface and Google Drive interface, as well as explore alternative methods for protecting a file from edits.
When the Google Docs is locked, you wont be able to make any edits to the file, make sugestions or add comments.
Locking the Google Docs from Google Drive
Locking a Google Doc is only possible from the Google Drive interface, not directly within the Google Doc itself.
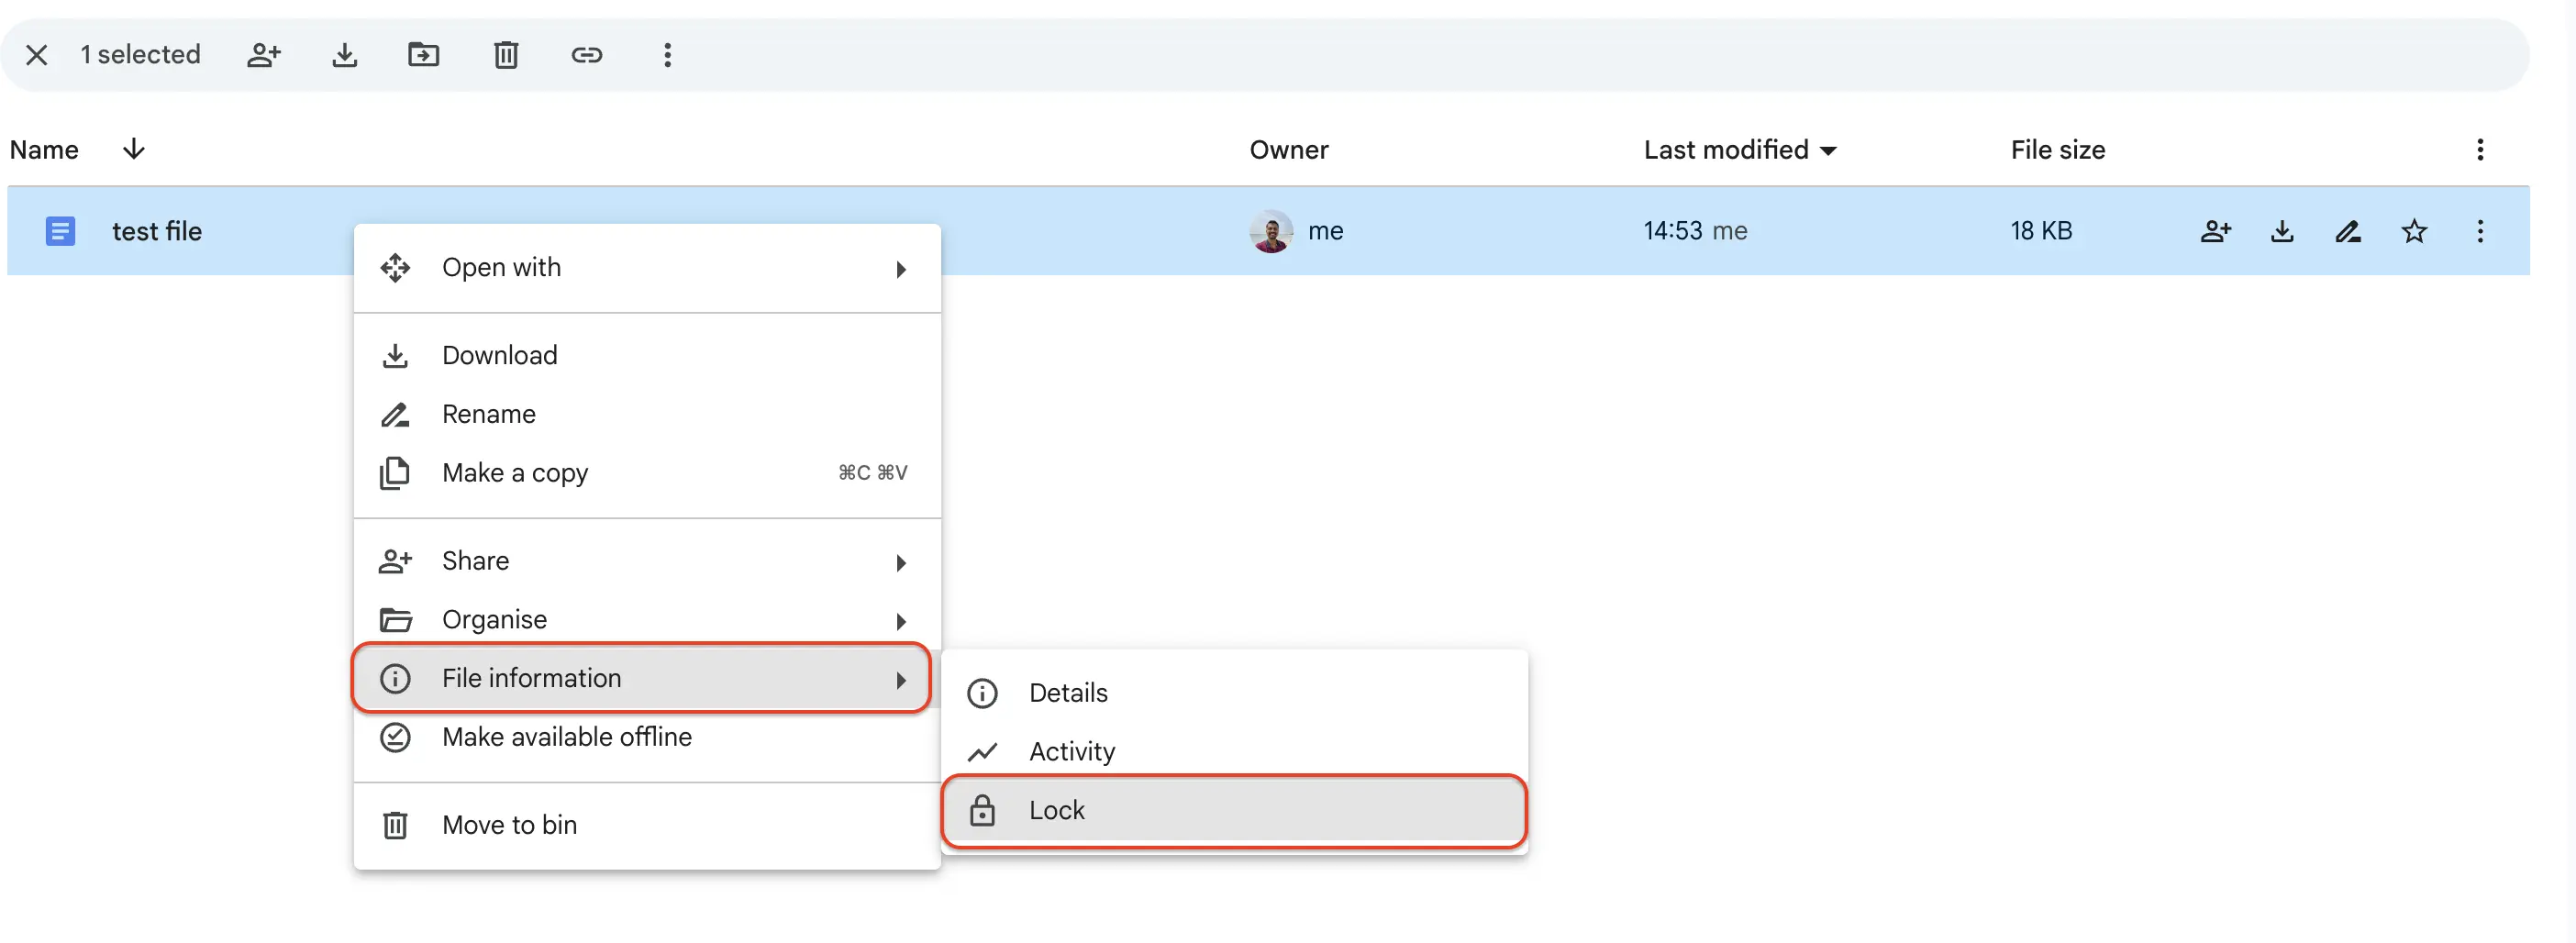
To lock a Google Doc, locate it in your Google Drive, right-click on the file, select File information, and then click Lock.
The following image shows the locking option in the context menu.
When you open the locked document, it will look like the one below:
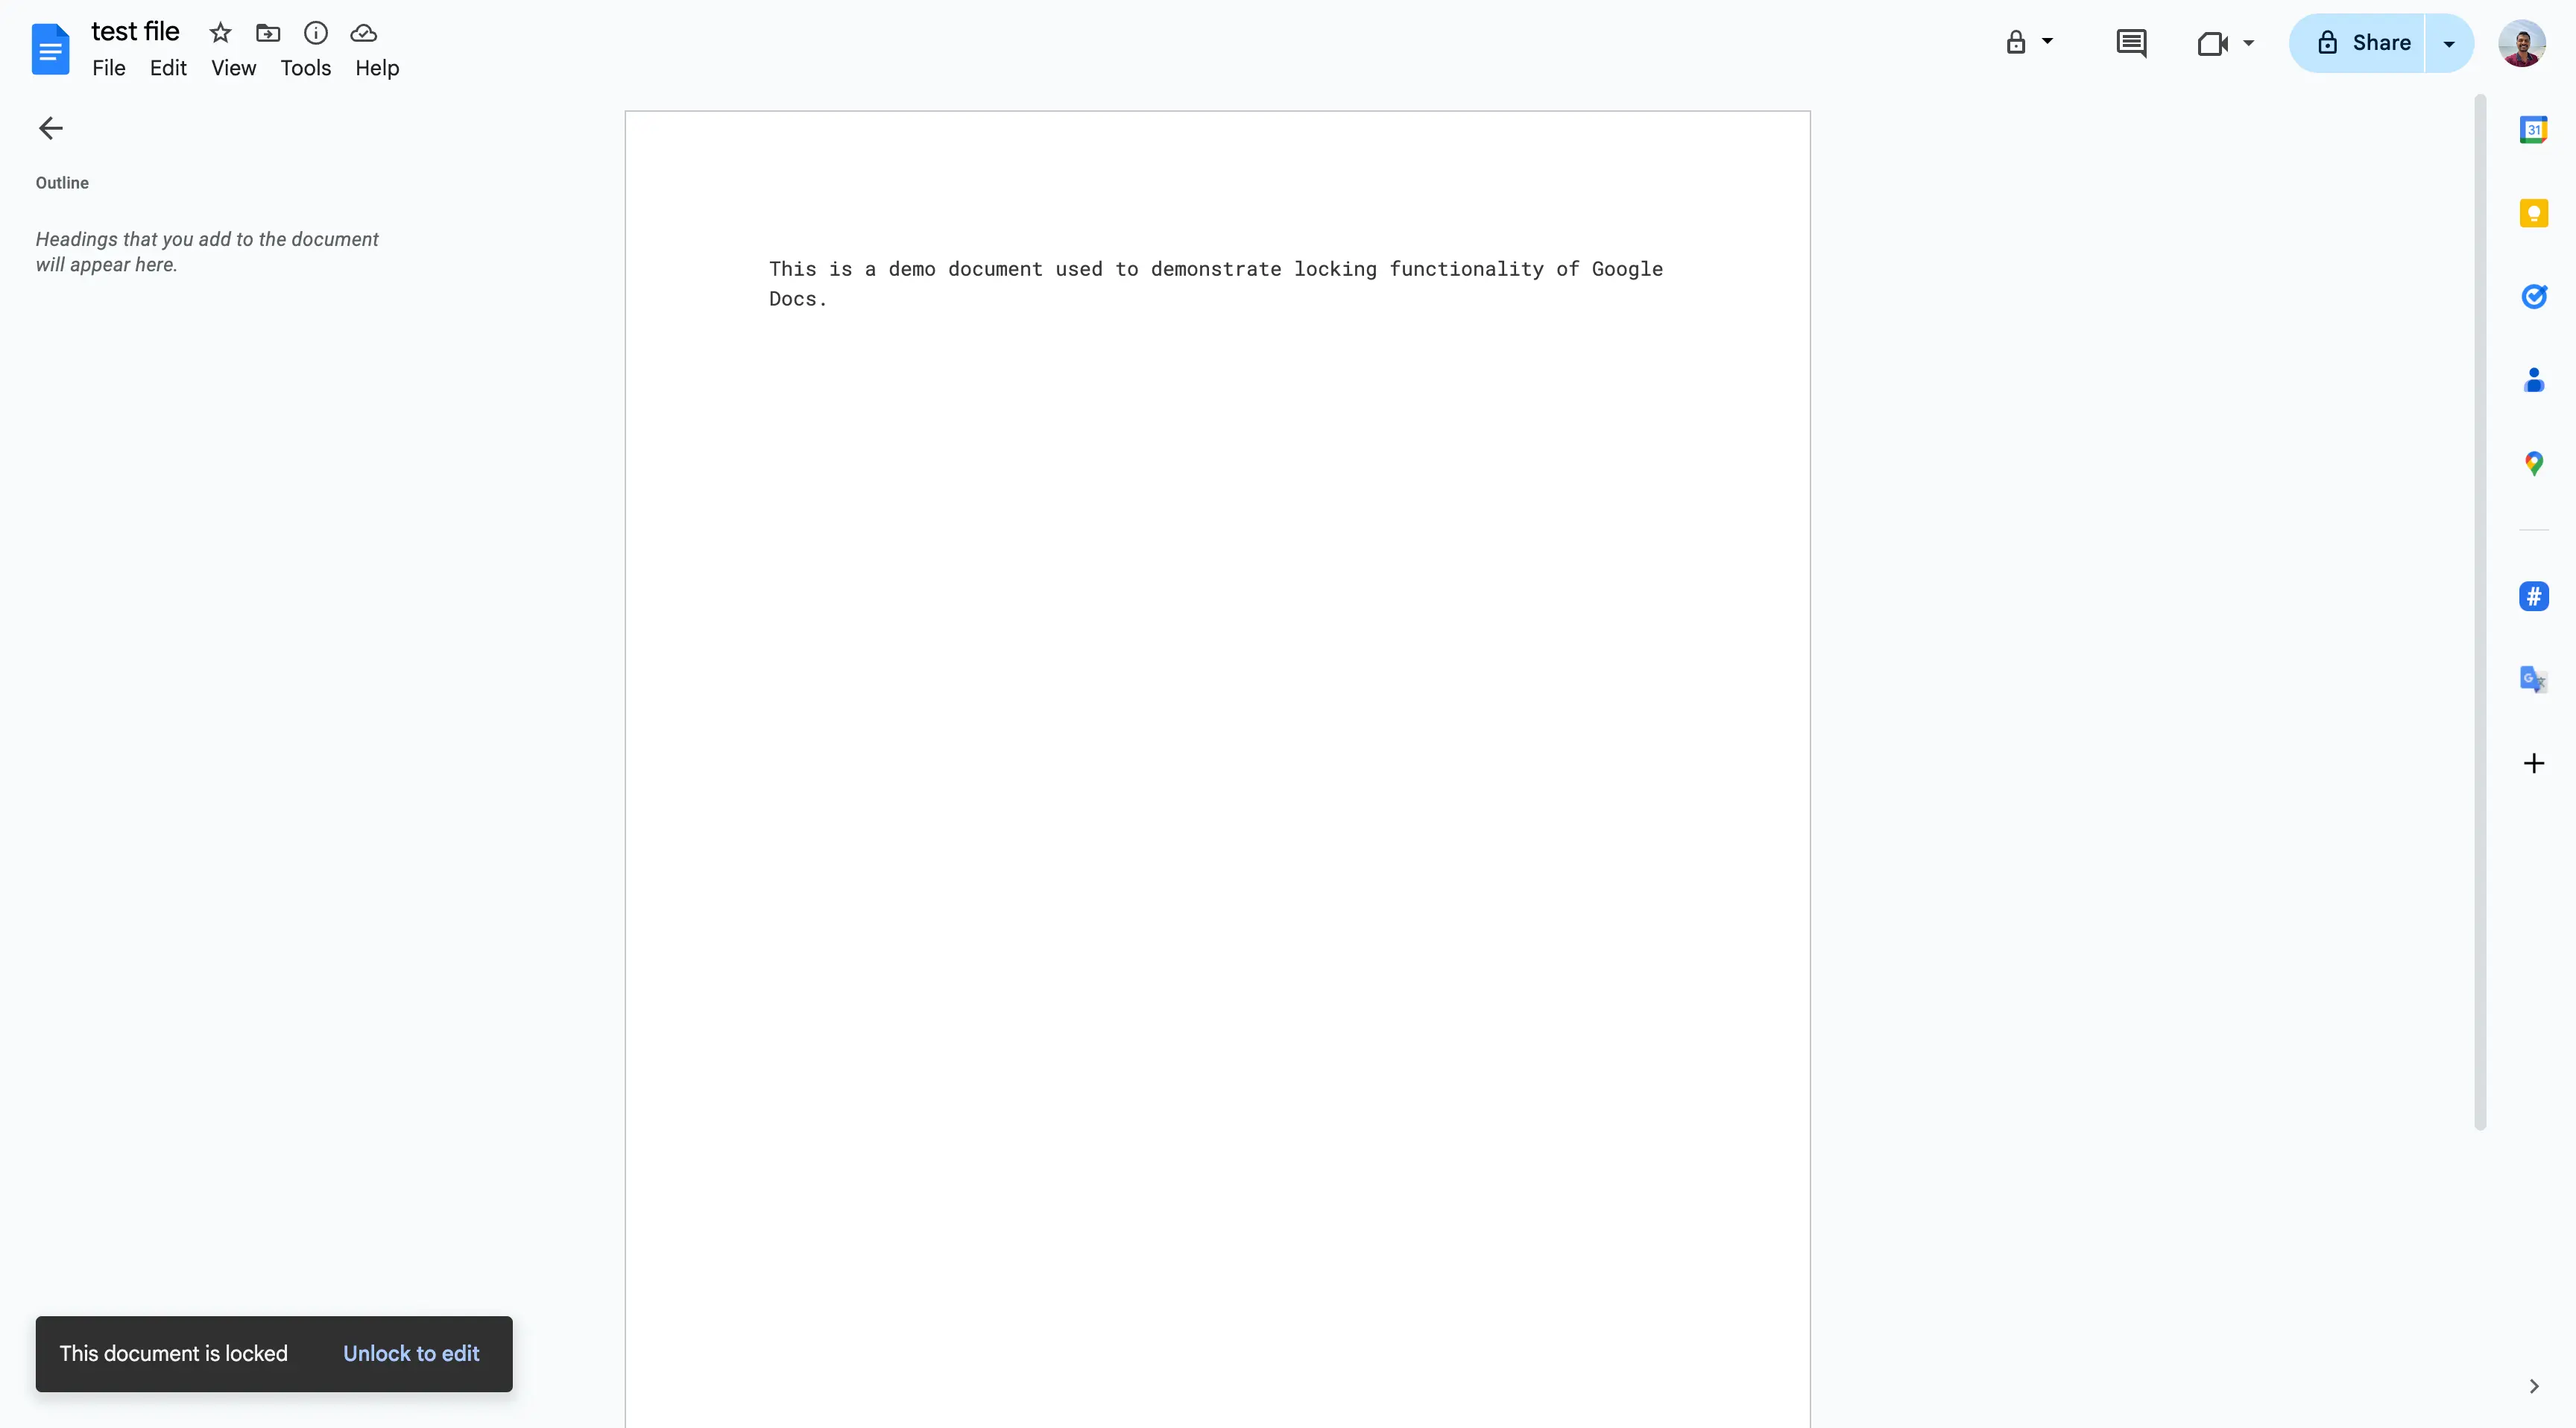
You will not be able to edit the document or add comments to it, even if you are the owner or have editor access to the document.
Permissions Required to Lock a File
It’s important to note that not all users can lock a Google Docs file. Only users with the permission level of Owner or Editor can lock a file. This means that if you’re a viewer or commenter, you won’t be able to lock the file. This ensures that only authorized users can restrict access to the file and prevent accidental edits or changes.
Unlocking Google Docs from Google Docs Interface
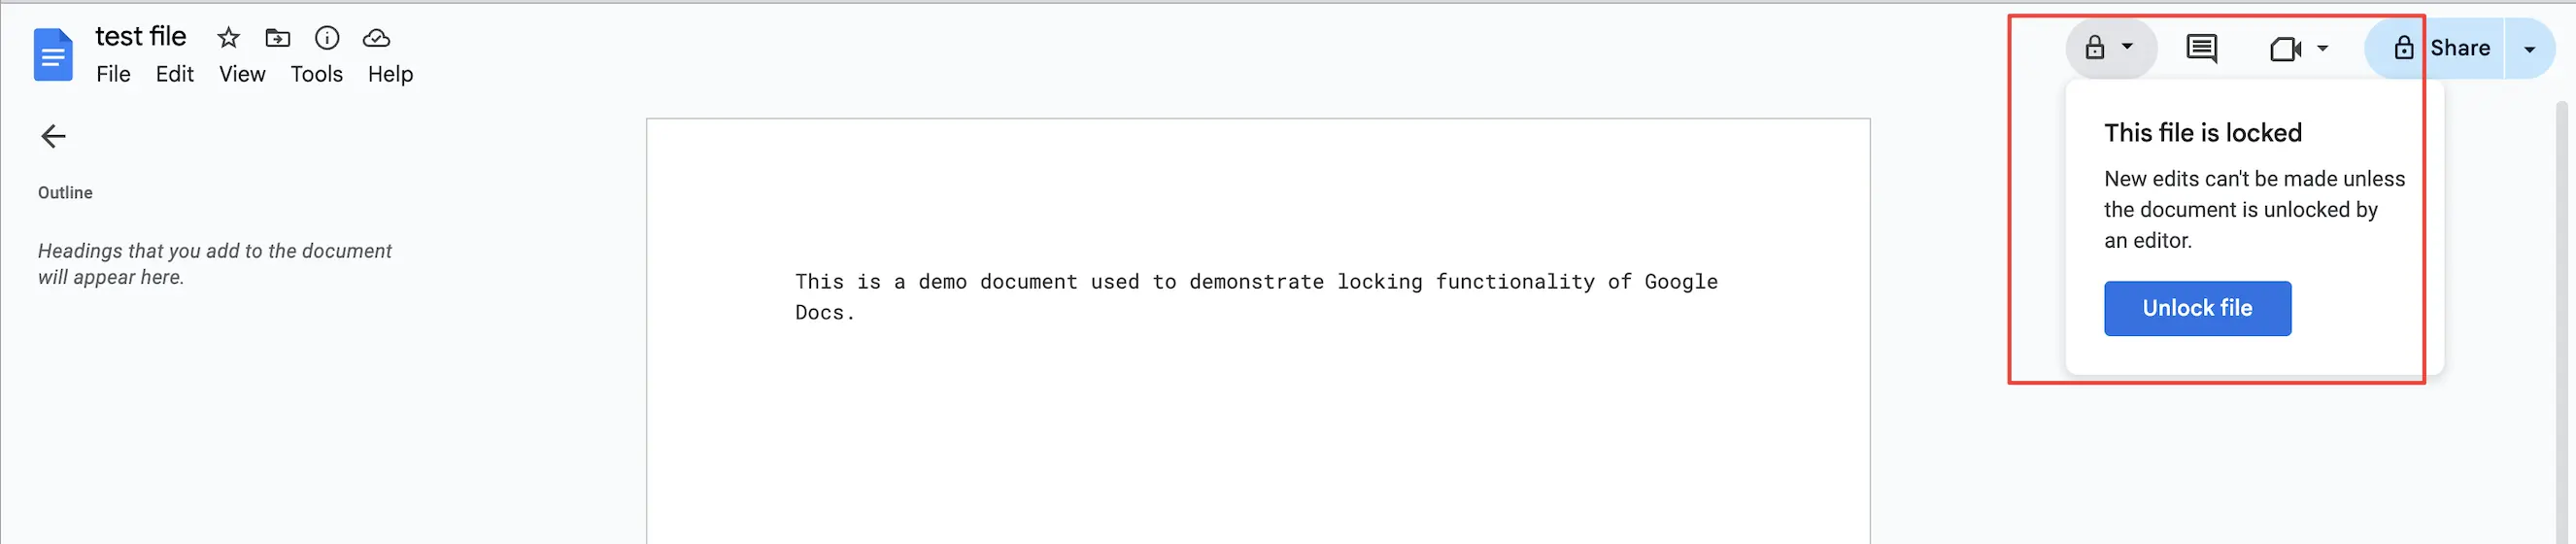
To unlock, click on the lock symbol and in the alert box, click on the Unlock file option. This option will be visible only if you’re the owner of the Google Docs or have editor access to the document.
Once unlocked, anyone with owner or editor access can make changes to the document, including editing content, suggesting changes, and adding comments.
Unlocking Google Docs from Google Drive
A locked file can be unlocked from the Google Drive interface as well.
To unlock a Google Doc from the drive interface, locate it in your Google Drive, right-click on the file, select File information, and then click Unlock.
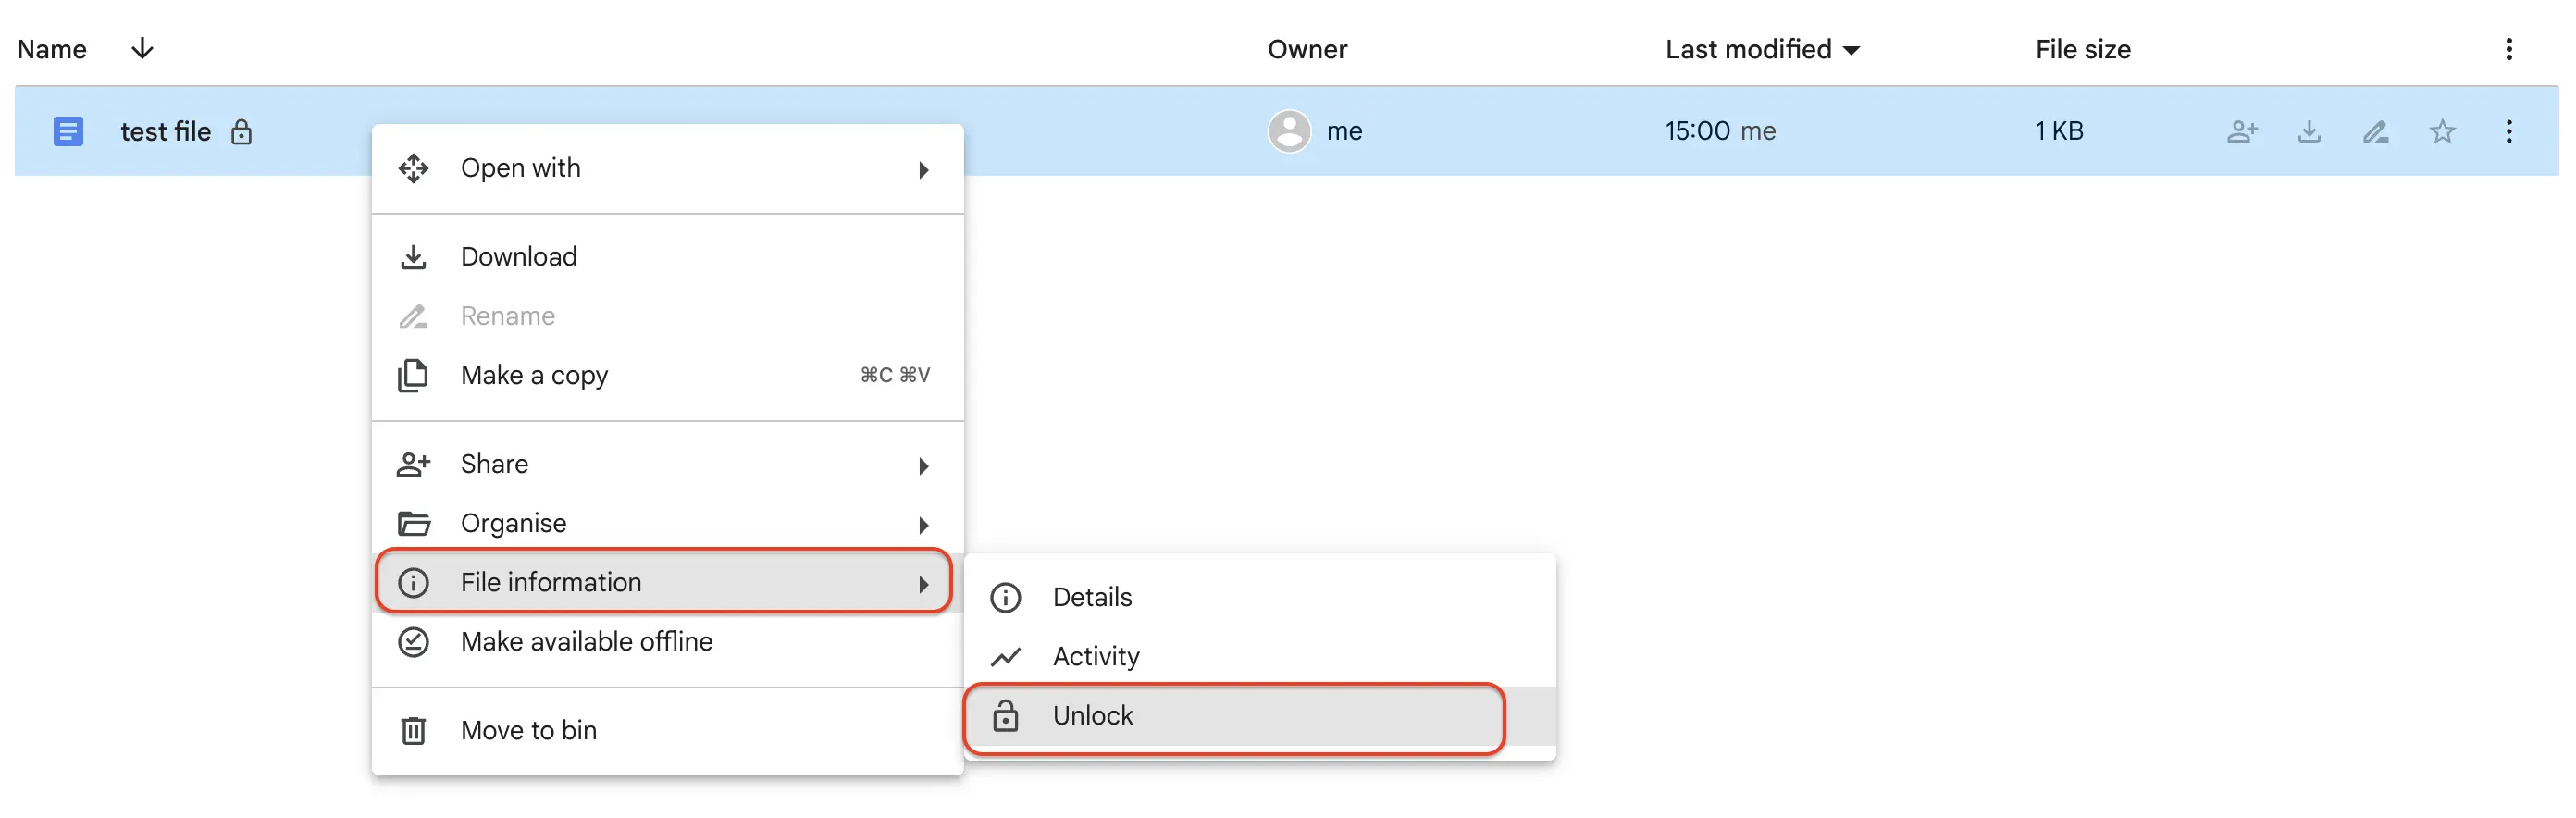
After unlocking, anybody with the owner or editor access can make changes to the document.
Alternative Ways of Protecting a Google Docs
While locking a Google Docs document is an effective way to prevent unauthorized edits, there are other ways to protect your document.
Here are a few alternative methods:
Exporting to PDF
One way to protect your Google Docs document is to export Google Docs to a PDF file. This will create a read-only version of your document that cannot be edited.
To export your Google Docs document to PDF, follow these steps:
- Open your Google Docs document.
- Click on the File menu.
- Select Download and then choose PDF Document (.pdf).
By exporting your document to PDF, you can share it with others without worrying about them making changes to the original document.
Setting Permissions
Another way to protect your Google Docs document is to set permissions for specific users or groups. You can control who can view, edit, or comment on your document by adjusting the permissions.
To set permissions, follow these steps:
- Open your Google Docs document.
- Click on the “Share” button.
- Enter the email addresses of the users or groups you want to share the document with.
- Choose the permission level for each user or group (e.g. Editor, Commenter, or Viewer).
By setting permissions, you can ensure that only authorized users can make changes to your document.
Conclusion
In conclusion, locking a Google Docs document is a simple and effective way to protect your work from unwanted changes. By following the easy steps outlined above, you can ensure that your document remains secure and intact.
Additionally, exploring alternative methods such as exporting to PDF and setting permissions can provide an extra layer of protection for your documents. By taking these steps, you can have peace of mind knowing that your work is safe and secure.